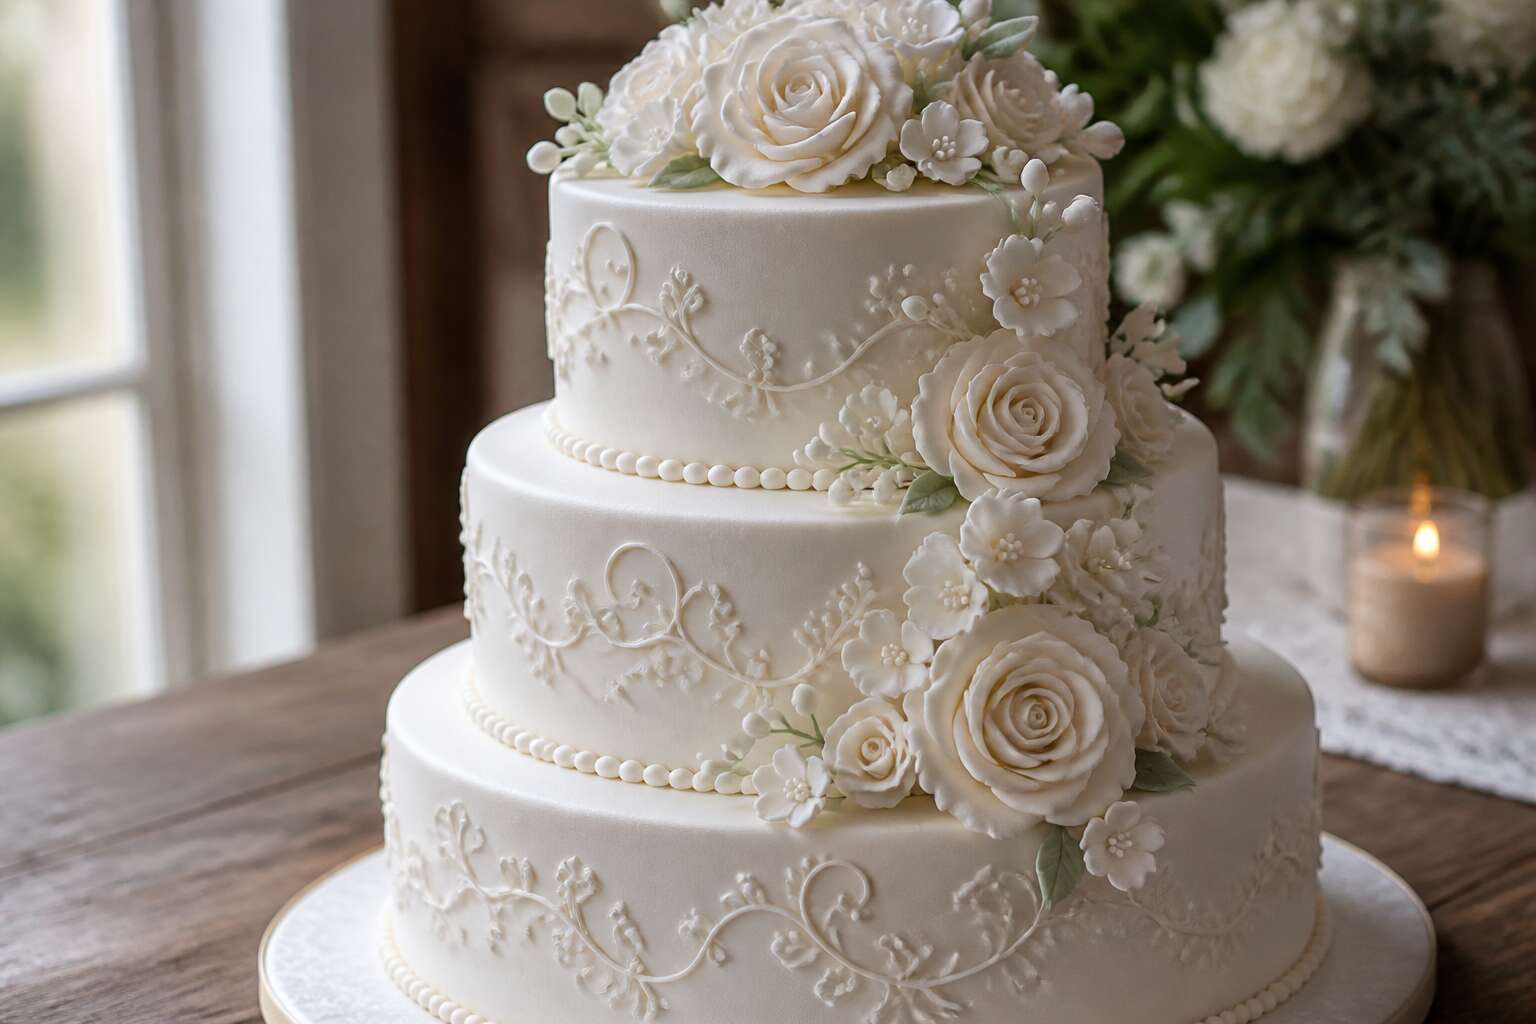
Cake Photography Inspiration
Creative Angles to Showcase Your Cake
One bold stripe of sunlight across the icing can change everything. I have shot cakes in Joburg and along the Garden Route, and the angle always matters more than the lens. Back away from the front of the stand. Move to a three quarter position. That slight shift reveals the layers, the drips, and the honest texture of the buttercream.
Try these specific approaches:
- Hold the camera low for a towering silhouette
- Look down for the symmetry of the platter
- Frame a slice through the side glass
Each one captures a different story. The low angle makes the cake feel monumental. The top view shows the florist’s work. The side shot lets the filling speak.
Your wedding cake pictures should feel like a guest’s glance, not a staged portrait. Walk around the table. Check the reflections in the cutlery. That unexpected corner will deliver the true personality of the dessert.
Styling Props That Elevate Cake Photos
A cake does not exist in a vacuum. The cloth beneath it, tarnished silver, a single stem of wild rosemary. These objects change the physical memory of the day. Threadbare linen carries history. Heavy stoneware grounds the sweetness, something solid to resist the sugar. The quiet drama of wedding cake pictures comes from this tension.
Consider the props that curate this stillness:
– A moody, hand-painted charger plate, cracked at the edge
– Unpolished brass candlesticks with burned wicks
– A velvet ribbon tied unevenly around the base
– A handwritten menu card propped against the stand
These elements trap the light. They curve it around the icing instead of washing over it. A pale cake on pale stone becomes a ghost. Add a dark wooden board, and the texture wakes up. The florals that spill over the edges carry their own shadows. The cake plays witness to the table.
Texture matters more than color. Rippled glass, hammered metal, even a rough slice of sandstone from the Karoo. These surfaces pull the eye across the frame. They give the viewer a place to land before they look at the sugar work. In the coastal humidity of Umhlanga or the dry air of the Highveld, props either sweat or splinter. Choose what survives the hour. The photograph remembers the humidity even when the camera does not.
Seasonal and Thematic Cake Shoots
September in Johannesburg means the jacarandas are lying. But for wedding cake pictures, the season dictates more than the backdrop. A winter shoot in the Cape Winelands demands dark berries, a naked cake, and a fireplace glow. Summer in Durban? Your buttercream will melt before the vows, so lean on naked cakes or semi-frozen elements. Autumn brings quince, pomegranate arils, and the last of the wild figs. Spring is chaos, but the light is perfect for wedding cake pictures.
Consider thematic shoots that anchor the cake in a story:
- A Karoo theme with a slab of sandstone, dried proteas, and a dusty blue backdrop
- A Highveld picnic theme with gingham, a thermos, and shortbread cutouts shaped like fynbos
- A Winelands harvest theme with vine leaves, a barrel lid, and a smear of grape must
A theme gives the cake a job. It stops the frosting from being the sole narrator. The wreath of buchu or the rusted wire around a vintage stand tells a specific afternoon. Those stories make wedding cake pictures feel like a page from someone’s diary, not a catalog shot.
Incorporating Floral and Greenery
Cape Town’s south-easter might be howling, but that doesn’t mean your wedding cake pictures need to feel rushed or flat. The secret often lies in stepping away from the main reception table. A quiet corner with a white-washed wall, a patch of dappled light under a Milkwood tree, or even the textured gravel of a garden path can provide a cleaner canvas. When you introduce natural elements like pincushion proteas or trailing jasmine, you create a sense of place that a ballroom simply cannot replicate.
Of course, using local flora requires a bit of strategy. A sprig of buchu smells incredible, but it wilts quickly under harsh lights. Similarly, delicate snowberries add a lovely texture, yet they can be overpowered by a heavy, ornate stand. The key is to let the flowers speak, not shout.
1. Shoot early or late: The golden hour flatters both the sugar work and the leafy greens, creating soft shadows that add depth.
2. Squash the bug: Gently tuck a single king protea at the base of the bottom tier; it anchors the design without hiding the fondant details.
3. Get the detail shot: Take a tight crop of the greenery wrapping around the cake stand. This isolates the texture and gives you a stunning album filler.
Pairing a smooth buttercream finish with a sprig of glossy olive leaves creates a sophisticated tension between the rustic and the refined. The contrast makes the viewer want to reach out and touch the frame. That tactile feeling is what elevates a simple snapshot into a memory you will want to frame.
Ultimately, the most captivating wedding cake pictures are the ones that feel honest. They show the afternoon light catching a slight imperfection in the icing, or the way a petal casts a tiny shadow on the plate. It is not about having the most flowers or the tallest cake. It is about capturing the calm before the party, freezing that single, fleeting moment when everything looks perfectly in place. That is the image you will cherish long after the last slice is gone.
Essential Lighting and Backdrop Tips
Natural Light vs. Artificial Light for Cakes
The quality of light is the invisible architect of every great photograph. In South Africa, the sun offers a unique intensity that can either flatter a cake’s delicate details or wash them out completely. When you are chasing those perfect wedding cake pictures, the choice between natural and artificial light is not just technical; it is the defining factor between a warm, romantic image and a clinical, flat one. Mastering both will give you the freedom to shoot anywhere, from a vineyard in Stellenbosch to a dimly lit city hall.
Natural light is the gold standard for capturing the true texture of fondant and buttercream. Position the cake near a large window, but avoid the harsh midday sun. Instead, look for the soft, diffused glow of an overcast sky or the golden hour right before sunset. These conditions create gentle shadows that add depth without overpowering the cake’s design.
Artificial light, however, becomes your best friend when the venue turns to twilight. A simple off-camera flash or a continuous LED panel allows for complete control. When you need a guide for getting started, consider these approaches for your artificial setup:
1. Use a softbox to mimic the diffusion of natural light.
2. Angle your flash at 45 degrees to avoid direct, unflattering reflection from the icing.
3. Add a second light source to separate the cake from a dark background.
The backdrop is the silent partner in this narrative. A textured plaster wall or a simple linen sheet can add context, but avoid anything with a busy pattern that competes with the cake itself. Ultimately, the best approach is to learn how to blend both light types. By understanding the colour temperature of each source, you ensure your wedding cake pictures remain timeless, true to the bakers’ art, and full of the atmosphere that made the day special.
Best Backgrounds to Make Your Cake Pop
The backdrop determines how the eye travels across the frame. In South Africa, weathered wood, raw concrete, or even a sun-bleached linen curtain offer enough texture to frame the cake without stealing its voice. A background should anchor the cake, not shout over it. When the venue provides a busy wall, pull the cake forward and use a shallow depth of field to let the backdrop dissolve into a wash of colour.
Consider the colour temperature of your light against the backdrop. A warm tungsten bulb against a cool grey wall creates tension that draws the viewer in. When you are chasing wedding cake pictures, test how the background reacts under different lighting. Some textures absorb light; others bounce it back into the icing. Notice how a matte surface swallows glare, while a glossy one throws it straight back! Position a reflector to control that bounce when the backdrop sits too close to the cake.
- Matte backdrops reduce unwanted glare on the cake surface
- Dark backdrops make white icing appear more sculptural
- Pair the backdrop with the cake’s dominant hue for a cohesive image
Your choice of background ultimately shapes the mood of the entire photograph, and that mood carries directly into your wedding cake pictures. Keep it simple, keep it deliberate, and the cake will do the rest.
Using Reflections and Mirrors Creatively
Light behaves like a sculptor’s tool set. When you photograph a cake, you are not just documenting a dessert, you are shaping its form. One of the most underutilised techniques in wedding cake pictures is the use of controlled reflections. A mirror placed at a forty-five degree angle can catch a sliver of window light and bounce it directly into the shadowed side of a tier. This subtle fill light adds depth without the harshness of a direct flash.
Before you start moving furniture around, step back and observe the available light sources. A large window with sheer curtains provides a soft, diffused glow that flatters white fondant. If the light is too dim, you can use a simple silver reflector, but position it carefully. You want to lift the shadows, not flatten the entire structure. For a more dramatic look, place a black card on the opposite side of the cake to deepen the contrast and create a striking separation between the confection and its environment. These small adjustments are often the difference between a flat snapshot and a professional image.
Reflections, however, are not only about controlling shadows. They are also about storytelling. A strategically placed mirror behind the cake can capture the intricate piping on the back tier, or the happy bustle of the venue in the background. This creates a layered narrative that draws the viewer in. Similarly, a polished marble tabletop or a glass cake stand can produce a stunning mirrored base that anchors the subject. The refraction of light through a crystal glass or a champagne flute nearby can scatter tiny sparkles across the scene, adding a touch of celebration.
When you are working with these glossy surfaces, remember to check your angle. Tilt the mirror slightly down to avoid capturing the ceiling lights or your own reflection. Clean the glass thoroughly, as fingerprints will show up as dull smudges in the final edit. Here are a few positions that typically yield excellent results:
1. Place the mirror on the left side of the cake, angled to catch a north-facing window. This provides a cool, even light.
2. Set a small compact mirror on a stack of books to bounce warm artificial light up into the bottom of the cake where the plate meets the frosting.
3. Use a hand mirror on a stand behind the cake to visually “slice” a thin line of light across the back edge, creating a glowing rim.
Ultimately, the goal is to use reflections to enhance the texture and story of the cake. These tricks allow you to work with the environment rather than against it, changing the mood with just a slight shift in perspective. The soft bounce of light off a nearby surface can make a simple buttercream look velvety and rich. It is this attention to detail that transforms standard wedding cake pictures into captivating visual memories.
Working with Your Photographer
Questions to Ask Before the Wedding
A photographer’s lens can document your cake, but only if you know what to ask. Before the wedding, I ask how they handle sugar artistry under different lighting conditions. Their answer reveals whether your wedding cake pictures will capture delicate details or wash them out.
Request full galleries of previous cake work. Ask about their backup equipment for those moments. Here are essential questions to pose:
- How do you position the cake for maximum visual impact?
- What happens if the cake arrives late or damaged?
- Do you shoot details before the reception begins?
These queries ensure the final images reflect the care you took with every tier.
How to Direct Cake Photo Sessions
Timing Your Cake Photos for Best Results
A staggering 87% of couples rank photography as their top wedding investment, yet the cake cutting is often squeezed into a chaotic frenzy. Getting that perfect shot requires meticulous planning with your photographer, not luck. The golden hour before the reception begins is your secret weapon for soft, flattering light. This window of calm allows for a relaxed and creative session, far from the pressure of watching guests.
Your photographer’s schedule is a delicate puzzle. Coordinate the cake moment to dovetail seamlessly with the sunset portraits and the first dance. A gentle nudge to your master of ceremonies ensures the band finishes their set on time, giving the camera crew a clear stage. This orchestration means no one is rushing, and the emotion stays genuine.
The goal is capturing the joyful anticipation, not just the slice. Ask your photographer to focus on the subtle details, like your hands resting together on the knife handle. These candid, connective moments are what truly elevate your album. Remember to discuss the lighting setup for the dimly lit reception hall beforehand, so they are prepared for the exact scene. By syncing the schedule with their expertise, those wedding cake pictures will be timeless. Ultimately, this careful timing turns a fleeting ritual into a cherished, permanent memory.
Editing Styles and Filters for Cake Images
The first slice is a performance, and the audience is your camera. Most couples obsess over the venue and the dress, but the cake table is where the magic gets frozen in time. The real secret to stunning wedding cake pictures lies in the post-production conversation you have with your photographer before the big day.
You see, editing styles are a language of their own. A bright, airy edit will make buttercream look ethereal and soft. A moody, dark edit will turn chocolate ganache into something brooding and dramatic. You need to decide which dialect speaks to your wedding’s vibe. If your reception is a sun-drenched garden party, those washed-out, pastel tones are your best friend. But if you are celebrating in a candlelit barn, lean into the shadows and rich contrasts. Do not leave this choice to chance; ask to see a full gallery from a recent wedding, not just the highlight reel.
Filters are the quick fix, but a professional undertones every image with a custom preset. That is the difference between a generic snapshot and a work of art. When you discuss your cake, mention the specific details you want highlighted. Is it the intricate sugar flowers or the metallic leaf accents? Those details need a certain sharpness and color saturation to pop. A blanket filter can flatten those textures into a blur.
Here is a practical checklist to guide that discussion:
1. Ask how they handle mixed lighting, especially if the cake table is near a window and a tungsten lamp.
2. Confirm they shoot in RAW format, which gives them the flexibility to fix any color casts.
3. Clarify their turnaround time for sneak peeks, because you will want that shot of the topper for your socials immediately.
Ultimately, you are not just hiring someone to press a button. You are hiring an artist to paint with light and shadow. The final gallery should feel like a cohesive story, where the cake is a character, not a prop. Trust their eye, but guide their hand. When the edit is right, you will not just see a dessert; you will taste the memory of that sweet, celebratory moment every time you look back at your wedding cake pictures.
Getting Both Wide Shots and Close-Ups
Wedding cake pictures are a negotiation between the whole and the fragment. The wide shot anchors the cake in the room’s geography, the table, the crowd, the light. It is a documentary frame. The close-up moves into the unseen, the sugar veins and the knife marks left by the first cut. It strips away noise and forces attention onto a single detail. Neither perspective is complete alone, and your photographer should move between the two without losing the evening’s momentum.
Working with your photographer on this dual approach ensures the gallery holds both the grandeur and the intimacy of the reception. One frame places you at the scene; the next places you inside the cake. The wedding cake pictures that linger accept both responsibilities without choosing a favourite. Hold that tension, because the cake does. It is a monument and a confection.
Sharing and Displaying Your Cake Pictures
Creating a Wedding Hashtag for Your Cake
There is a strange intimacy in watching a wedding cake disintegrate. The first slice often falls awkwardly, yet someone always captures it. For a few hours, that cake is the most photographed object in the room. Weddings are built on ritual, and the cake demands its own legacy. We share these images to preserve what taste cannot.
Creating a dedicated hashtag for your wedding cake pictures transforms scattered uploads into a coherent collection. Guests post from their phones, photographers deliver curated files, and all of it converges under one searchable phrase. This act of naming gives order to memory. It also reveals how your community sees your cake, their angles, their fleeting glances.
Some hashtags fail because they are too long or too generic. I have watched couples choose “love” only to drown in strangers’ content. A precise tag works better. It acts as a boundary, one that frames your cake’s brief existence. When you display these images later, you are not merely showing sugar and flour. You are holding a specific moment, one that your guests helped construct. That aggregator becomes the archive of your wedding cake pictures, a quiet ledger of joy.
Printing and Framing Cake Photos
The digital afterlife of wedding cake pictures is peculiar. Guests snap, upload, and scroll past within hours. Yet the printed photograph holds a different authority. It sits on a mantelpiece or in a leather album, demanding nothing but receiving repeat glances. There is a permanence to paper that screens cannot mimic.
Consider the texture of a well-printed image. The gloss catches light the way royal icing does. A matte finish softens the details, much like a memory softened by time. When you frame cake photos, you invite the cake back into your home. Some couples choose a single dramatic shot, others assemble a grid of candid guest angles.
The most telling framing often follows a sequence:
1. The untouched cake
2. The first cut
3. The aftermath
This triptych narrates the full arc. Your wedding cake pictures deserve that story, held in glass and wood rather than drowned in an algorithm. Print them. Display them. Let them fade slowly under sunlight, as all good rituals should.
Social Media Sizes and Formats for Cake Images
The digital afterlife of wedding cake pictures is peculiar. Guests snap, upload, and scroll past within hours. Yet the printed photograph holds a different authority. It sits on a mantelpiece or in a leather album, demanding nothing but receiving repeat glances. There is a permanence to paper that screens cannot mimic.
Consider the texture of a well-printed image. The gloss catches light the way royal icing does. A matte finish softens the details, much like a memory softened by time. When you frame cake photos, you invite the cake back into your home. Some couples choose a single dramatic shot, others assemble a grid of candid guest angles.
The most telling framing often follows a sequence:
1. The untouched cake
2. The first cut
3. The aftermath
This triptych narrates the full arc. Your wedding cake pictures deserve that story, held in glass and wood rather than drowned in an algorithm. Print them. Display them. Let them fade slowly under sunlight, as all good rituals should.
—
The same wedding cake pictures that rest on your mantelpiece deserve a measured approach on social media, where the average post lasts only a moment. A square crop of the full confection performs reliably on most platforms, while a vertical composition captures the height of a multi-tiered design. For feed cohesion, consider the 4:5 ratio on Instagram. For stories, a 9:16 aspect ratio carries the full drama of the cake table. The current formats reward deliberate framing:
– 1080 by 1350 pixels for feed posts
– 1080 by 1920 pixels for stories and reels
– 1200 by 630 pixels for shared links
These dimensions preserve the integrity of the image across devices. When you share your wedding cake pictures, let the natural textures speak. The goal is to show the layers of fondant and the crumb of a first slice, not to fit a fleeting trend. A clear, formatted image invites the viewer to pause and admire the craft of your baker, one quiet scroll at a time.
Building a Wedding Album Around the Cake
The scent of vanilla and fresh flowers fades, but the memory of the cake remains. When you flip through the pages of a wedding album, the tactile feel of the paper brings you back to that moment. A digital gallery can feel distant, but a printed photograph invites you to linger.
Sharing your wedding cake pictures should be a deliberate act. The album allows you to curate a narrative for future generations. Your children and grandchildren will see the intricate details of the sugar work up close. They can touch the page and feel the texture of the print. It is far more intimate than a swipe on a screen.
When building the album, arrange the images to tell the story of the day. You might start with the empty table setting, then move to the full tiered creation. Follow this with the cutting ceremony and finish with the joyful chaos of guests dancing. This sequence creates a timeline you can revisit. For the best results, consider a few key elements:
– Select high contrast prints for the fondant details.
– Use full page spreads for the grand reveal.
– Place close ups of the topper opposite candid guest reactions.
– Choose a heavy, matte paper to reduce glare.
The final page of the section should hold a single, quiet shot. Perhaps the last slice on a plate. This simple image closes the chapter. It reminds you that the sweetness was shared, the moments were captured, and the printed page holds a slice of history that no screen can replicate. Your wedding cake pictures deserve that permanence.
Using Cake Photos in Thank-You Cards
Capturing the perfect shot is only half the journey. A single, thoughtful image can extend the life of your celebration long after the last dance. This is where your wedding cake pictures transform from documentation into a gesture of gratitude, a tangible link between you and your guests.
A thank-you card is a rare physical artifact in a digital world. Using one of your wedding cake pictures turns a simple note into a prized keepsake. Guests can pin it to a fridge or tuck it into a journal, carrying a piece of your day with them. It adds a personal dimension that a generic card simply cannot achieve. When you choose the photo, consider these options for maximum effect:
1. A wide shot that captures the cake within the full reception hall.
2. A candid moment of the two of you feeding each other the first bite.
3. A close-up of the intricate slice being placed on a plate.
4. A joyful action shot of the cake being cut with a shared hand.
Sending a card with a beautiful image does more than say thank you. It shows the care you took in curating the visual narrative of your event. Your wedding cake pictures are not just for your own album; they are a shared treasure. Select an image that speaks to your unique style, whether it is minimal and modern or rich and ornate. The right photograph will communicate the warmth of the occasion without relying on lengthy prose, making your appreciation feel both genuine and immediate. It turns a formality into a sincere and personal keepsake that people actually want to receive.
Submitting to Wedding Blogs and Magazines
Editors receive hundreds of wedding cake picture submissions each week. The ones published share a common thread: they tell a story beyond the dessert. Your package should show how the cake interacted with the venue, light, and guests.
When preparing your wedding cake pictures for blogs and magazines, focus on what makes your event unique. A wide shot places the cake in the room. A detail shot of the topper or texture adds depth. Editors value variety because it gives layout options.
- RAW files preserve print detail.
- Golden hour captures warm tones.
- The cutting moment provides emotional context.
After submission, share the accepted feature on your channels with a link back. This builds a portfolio that attracts future couples. Your wedding cake pictures become a record of your style, not just one day.


0 Comments